

Sublimation printing is a widely practiced form of printing, thanks to the multiple advantages you have with it. However, there can be times when sublimation is not an option for you. This can be due to any drawback that sublimation printing has or a personal preference not to use sublimation methods. In such a situation, you should know the alternatives to sublimation printing that you can go to for the same high quality of printing.
We have compiled this article to help you through some of the best alternative methods to give you information on 5 alternatives to sublimation printing.
5 Alternatives To Sublimation Printing:
- Direct To Garments (DTG):
- Heat Transfer
- Vinyl Cutting
- Screen Printing
- Spray Painting
1) Direct To Garments (DTG) Printing:
Direct to garments or DTG printing is an amazing technique of printing for fabrics and an incredible alternative to sublimation printing. It uses a special direct-to-garment inkjet printer that prints directly on the fabric. DTG is an easy substitute for sublimation printing.
Equipment Needed:
- Direct To Garment Printer: Special printer for this printing technique
- Pretreater: For printing on dark-colored fabric.
- Heat Press: For the pressing of the fabric
- Inkjet Printer Ink: No need for special sublimation ink.
- Software: PC software for designing and editing.
- Accessories: This includes accessory items such as silicone or parchment paper.
Working:
The first thing you will be looking at is designing and adjusting the print image. Using your preferred editing software, adjust the size of your image so that it perfectly fits the layout of your t-shirt. If you are printing on a black or dark-colored fabric, then your software may give you the option to print with a white base that is great for such colored fabrics.
Once you are done adjusting your image, move on to your t-shirt. If you are printing on a dark-colored fabric such as black, you will first need to pretreat it using your pre-treater. Do press the shirt before that to remove any lines or wrinkles from the shirt. When pressing, use silicone or parchment paper to protect the fabric from heat damage.
Once your fabric is completely dry, it is ready to be printed using a direct-to-garment printer. Now do remember the above-mentioned pretreating process is for dark fabrics. For light-colored fabrics, you can directly move to this step.
Remove the lid or hoop from the plate or tray and place the shirt on it to make the center entirely flat on the plate. Tuck the sidings of the shirt inwards under the plate for a full stretch. Push the plate and the shirt into the printer and start the printing process.
After the shirt printing is complete, press it again, and your fabric will be printed using a direct-to-garment printer.

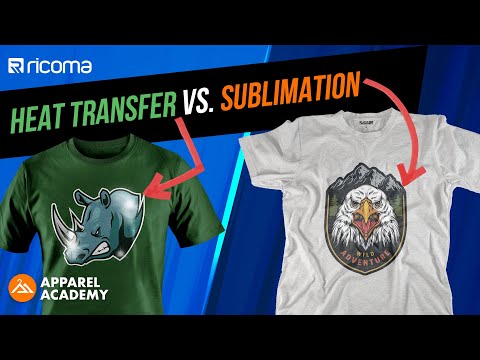
2) Heat Transfer Printing:
The second alternative method that we will discuss is heat transfer. This is the form of printing in which, instead of complete infusion and bonding of molecules, the print forms a layer on top of the fabric that you can feel. The method is quite popular and widely used as an alternate method to sublimation.
Equipment Needed:
- Printer: You need a printer for heat transfer printing. An inkjet or toner printer is completely compatible with this job.
- Heat Press: It is required to press the print onto the surface.
- Ink: High-quality printing ink compatible with heat transfer.
- Heat Transfer Paper: Our main item is the special heat transfer paper needed for this printing method.
- Accessories: You standard accessory stock for any such form of printing.
Working:
The first step is to get a heat transfer paper of high quality. What you will be looking to do with the transfer paper is that you need to print out your design on the heat transfer paper. Don’t forget to adjust your image size according to the size of the transfer paper you are using.
Once you have printed your image on the heat transfer paper, you need to check if your transfer paper already has an adhesive backside or not. If not, then you no the press an adhesive sheet on the heat transfer paper using the heat press machine.
Once you have pressed the sheet on the heat transfer paper, remove the sheet to get the adhesive backside of the heat transfer paper. Now stick the heat transfer paper with your design on the center of your fabric or t-shirt.
Press the heat transfer paper using the heat press at 350-370 degrees for around 90-120 seconds with high pressure.
After the press is completed, remove the transfer paper sheet, and you will have your image printed on the t-shirt.
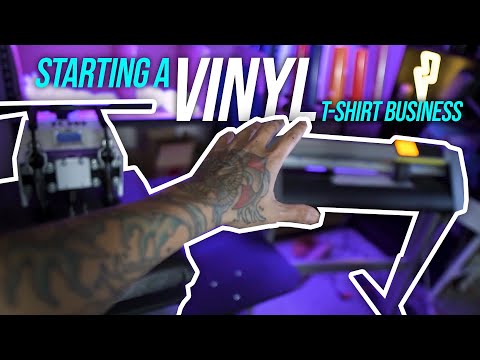
3) Vinyl Cutting Printing:
As the name suggests, this is a method of printing that uses vinyl sheets as a medium of transfer of prints on the medium. Vinyl cutting printing is an excellent alternative if you cannot use the sublimation method.
Equipment Needed:
- Vinyl Sheets: You need printable vinyl sheets as they are the medium for printing on the fabric.
- Vinyl Cutter: You need a vinyl cutter for the proper cutting of the vinyl. You can also use a CAMEO or silhouette cutter.
- Heat Press: You will look to buy a heat press for perfect pressing.
- Software: You will require compatible software for the designing and editing process.
- Accessories: Cutting mat, parchment or Teflon sheets, cutting blades, and other accessories for proper printing.
Working:
The first thing to do is design, edit, and adjust your image or print using whatever editing software you are using. Set the size according to the shirt and how large the cutter can cut.
The next step involves your vinyl cutter. Send your final design to the vinyl cutter and place the vinyl sheet in the cutter. The vinyl cutter will cut the design or the image on your vinyl sheet.
Once the design has been cut on your vinyl sheet, you will need to remove all the extra vinyl sheets leaving just the design. Remember to remove the inner vinyl pieces in your design that you cannot remove during the outer removal.
Once you are done removing the extra vinyl, you will be left with the adhesive vinyl sheet with only your design. Now place your shirt on the heat press and stick your vinyl design on your t-shirt.
Place a parchment or silicone sheet on top of the shirt before the press. Set the temperature to 330-350 and press each design for around 10-15 seconds.
After each press, peel off the vinyl sheet to reveal your final print.
4) Screen Printing:
Screen Printing is an old and traditional method of printing. With all the new technology out there, the popularity of screen printing has gone down a little. Still, it attracts many people, especially people looking for a cost-effective way of printing. The quality is excellent and durable, and thus it is still used by many people.
Equipment Needed:
- Framed Screen: The screen is the primary apparatus for printing the shirt’s design. You can use a wooden frame or aluminum frame screen.
- Photo Emulsion: The photo emulsion helps bring the design to life on the screen. You can easily find it at any printing store.
- Sanitizer: A sanitizer is an item that is mixed in with the emulsion to give the green color. Both the items can be found in a bundle at a store or online.
- Inkjet Printer: A printer is necessary for printing your design on the transparency sheets. You can also get them printed from a shop if you do not have a printer.
- Screen Printing Ink: This unique ink is like paint, and you need it for printing your design on the fabric. It gives the print its color.
- Scoop Coater: This is required to spread the emulsion onto the screen. It makes it easy to evenly distribute the emulsion on the screen. You can use a brush.
- Squeegee: Squeegee is used to push the ink through the screen and onto the t-shirt. You can use a wooden or aluminum squeegee.
Working:
We will be starting with our photo emulsion and the sanitizer. Add some water to the sanitizer and shake it properly. Then add the mixture to the photo emulsion and mix it as well as you can. Mix it as long as the color becomes a consistent green.
Once you have your emulsion mixture, we move onto our screen. Use a coater to spread the emulsion mixture evenly on both sides of the screen. You can also use a brush, but it can take longer to even out the emulsion.
After you are done spreading the emulsion, let it dry. When you let the screen dry, remember very carefully dry it in a completely dark space with no light as the emulsion is sensitive to light.
As the screen is drying out, you can move on to your print. Design and edit your print and print it out on transparency sheets. You can also use a sharpie pen as an alternative to draw and write on the transparency sheets. Check whether the ink appears opaque when seen through light or not. You can stick together two sheets to remove the visibility if there is visibility.
If you are working with a dark material, pick the super opaque ink to get bright colors.
Continued:
Once you have your prints, tape them to the screen’s backside with the print facing the screen. Now you treat the screen with intense light. You can put it in bright sun or under strong white light with the backside facing the light. Let the treatment go on for around 8-10 minutes.
With the treatment complete, you need to wash the screen. Wash the screen with strong water pressure, and you can use a toothbrush or hands to scrub the screen. This makes the emulsion print appear prominently on the screen.
Now you take your t-shirt and place it stretched so that the print appears in the right place. Now place the screen on the shirt and put the ink on the screen, and spread it on the emulsion design. This is known as flooding. This process requires the use of a squeegee. Now push and pull the ink on the emulsion using the squeegee, which will drive the ink through the screen onto the shirt.
When you remove the screen, you will have your design or image printed cleanly onto the t-shirt. You can reuse the screen by removing the previous emulsion using an emulsion remover.

5) Spray Paint Printing:
Using spray paint to customize your t-shirt is as simple as it gets. This method is not the most recommended in terms of how many chances there are for the results to be beautiful, but it is something you can try if you are looking to get artwork or design on a t-shirt for a low and simple price and method.
Equipment Needed:
- Fabric Spray Paint
- Tape
- Cardboard
- Freezer Paper
- Exacto Knife/Box Cutter
- Extra Accessories
- Stencil
Working:
The working of the spray paint is seen in two ways. One is crafting out your design or artwork using pencil and freezer paper. You can use a stencil that can be purchased or made using cardstock paper, printing your art on it, and cutting it.
Take the cardboard and put your print paper on it that has your design. Now take a freezer paper and place it on the design with the shiny side downward. Using a pencil, carve out the design on the freezer paper. Then, cut out the design on the freezer paper using the Exacto knife. You can use stencil in-form of stickers instead of this process.
Once you have your design, place the same cardboard below your t-shirt and tape your cut-out freezer paper design or your stencils. Adjust the position of them on the shirt before taping them.
Now cover the rest of the shirt entirely so that no spray spreads to that region. Be sure to cover everything carefully.
Spray the design spaces. Spray in a splashing manner to get the best results and an even spread of the colors. Do not spray too much, thinking that it will give dark colors because that can make the final print too blurry or undesirable. This is more important when using a dark color like black for the t-shirt. With the spraying complete, you will have your spray-painted design t-shirt.
FAQs:
Conclusion:
Sublimation printing is the most reliable form of printing for customization printing of different surfaces. However, it has its drawbacks, and sometimes you are looking for a substitute way. Fortunately, there are great alternatives to it, and they do cover up some of the flaws that come with sublimation printing. Understanding these 5 alternatives to sublimation printing can open the door for you to try new things and methods of printing and can give you customization access on surfaces that are not accessible with sublimation printing.

Hi, I am Charles, 25 years of age & an enthusiast blogger, also called the printer guy in my family. I bring you the top & unbiased reviews of sublimation printers.